Updating general site content
Contents
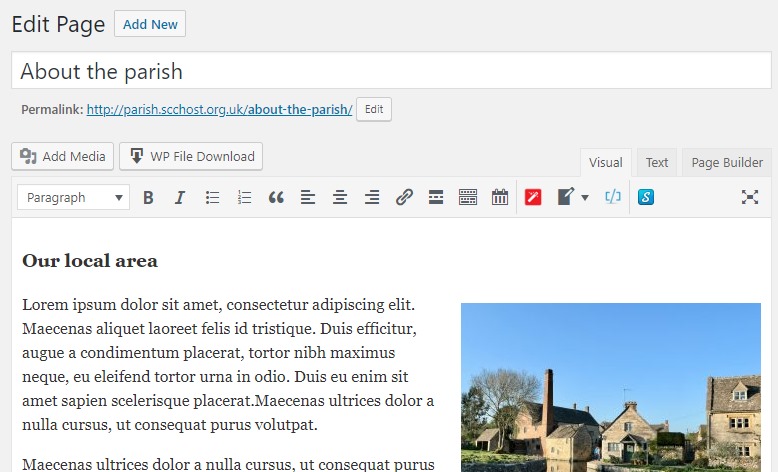
The simplest way to edit a page is to navigate to the page on your website then click on “edit page” on the WordPress bar at the top of the screen. (if you do not see the WordPress bar, you need to log in first – see Getting started with WordPress).
This will take you to the page editor where you can see the contents of the page in a familiar editing environment.
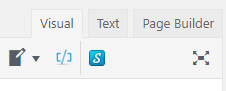
If your editor doesn't look like the above, ensure the editor is set to “visual” mode. This can be found on the top right of the contents editing area:
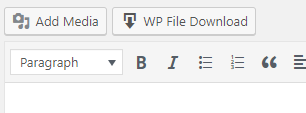
The tools in the editor are very similar to those found in MS Word. There are some additional tools that are geared towards advanced web editors – you can safely ignore the tools to the right of the “link” chain icon.
Accessibility guidance
Please do not use BLOCK CAPITALS within your content unless they are an acronym or a business name.
Once in the editor for a page’s contents, the simplest method to create content is to copy and paste it from MS Word. Most of the formatting and layout from MS Word will be preserved when you paste it into the editor. Some rarely used Word formatting may not be preserved, so be sure to check your pasted content for formatting errors.
The alternative option is to type the content directly onto the WordPress editor, as it is simple to create generic text paragraphs with bold text included. As a general rule, we avoid using italic text as it is difficult for people to read.
To add an image, click in the text where you want the image to appear in the text box (it’s usually a good idea to hit enter to create a new line for the image). Now click on the “add media” button at the very top of the content editor:
Once the media library has opened, you can select the image you want to add to your content. Then you need to ensure certain settings are correct in the right-side panels. These are:
These fields contain information about the image:
- Alt Text – this is used by screen-readers for the visually impaired. The reader will read out this text to the user so they can understand the purpose of the image. If the image is purely decorative, leave this blank.
- Title – this will be set automatically, or you can change it if desired.
- Caption – you may set a caption which will appear as text below the image. You can leave this blank if you prefer.
- Description – this can safely be left blank.
Accessibility guidance
Ensure that you have completed the alt tag field for all images used throughout the website.
These fields control how the image is displayed within the content, and if you want the image to link to other sites and content.
Alignment
- This sets how the image will appear within the text content and how the text will flow around the image. Setting this to left or right will position the image to the far left or right of the content, with the text flowing around it.
- Setting alignment to center will cause the image to be centered within the content, but text will not flow around it.
- Setting alignment to one will position the image to the left, and the text will not flow around it. This can create large empty areas in the content which might not be desirable.
You can change the alignment options in the content editor after placing the image. Do this by hovering over the image and a small set of icons appears above it.
Link to
This field allows you to set a link for the image, so users can click on the image to be taken to other pages/content. The four options are none, media file, attachment page, and custom URL.
- None - The default option to not link to anything
- Media file – this will allow users to click the image and file and see it in its full size, on its own. Please note: if you are adding a file for download (e.g. a PDF or word file) then choose this option to make it a download link.
- Attachment page – this will cause the image to link to a page that shows the image, its title, and its description.
- Custom URL – this allows you to set a custom link on the image. Don’t forget to set the link in the box immediately below!
Size
This lets you set the size of the image. WordPress will automatically resize images for you based on your needs. Typically, the default setting of “medium” will suit most of your needs, but you can set them to be thumbnail, medium, large, or full size. The full size option uses the images’ original dimensions – this should typically be avoided because some images might be far too large to use on the site this way.
To remove a link, click anywhere inside the text that is linked, then click the edit link button (the chain icon). In the box that appears, delete the link so that the box is empty, then click the arrow button. This will remove the link.
Headings are important for web-based content. They help divide up the page into sections for use by screen readers, plus they help search engines like Google to better understand the pages (which helps people find your content when searching).
When creating your content (in WordPress or in MS Word) be sure to use headings appropriately:
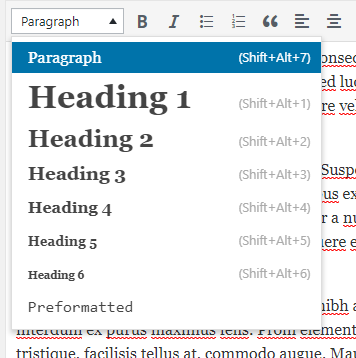
Do not use "heading 1" as this is used as the main title of the page and therefore should be avoided to stop confusion with viewers.
- Use “heading 2” for main titles and section title.
- Use “heading 3” for sub-sections and dividing up large sections.
- Use “heading 4” for any minor section titles.
- Use “paragraph” (normal text) for everything else.
Accessibility guidance
Don't be tempted to use bold formatting or BLOCK CAPITALS to help text stand out - use headings where applicable and only use bold where necessary.
To add a link to other content within your pages, first select the text you want to become a link, then click on the link button (the chain icon). This will show a small link window:
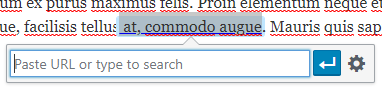
If you know the address of the page/content you want to link to, copy or type it into this box then click the arrow to create the link. If you want to link to other content on the site, click the cog to open the link editor:
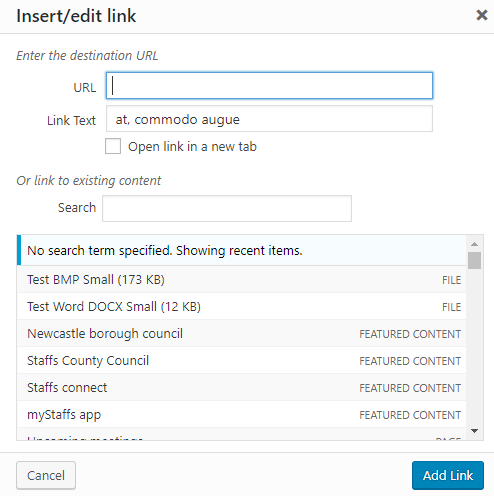
The top half of this page is a more expanded version of the simple link box you saw previously. The second (lower) half of this window is where you can select site content to link to. You can search by name to find the content you want, or you can scroll through the (very long!) list to find the content manually. Clicking an entry in the list will fill out the top half for you. Then you can click “add link” to complete the removal process.
Accessibility guidance
Please ensure that you use text within a sentence (as shown above) for your hyperlink rather than displaying a naked link on a page such as www.staffordshire.gov.uk. A screen reader will read every letter of the naked link, which won't be a great experience!
Before you commit your changes, be sure to check how they look on the site. To do this, you can click “preview changes” in the top right of the page:
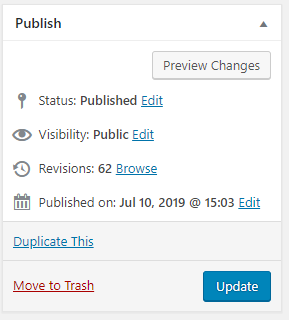
This will open a new tab for you to preview the changes and check they look correct. Once you are happy with the changes, you can click “update” to make the changes go live for everyone.
When creating a brand new page, the Update button will say “Publish” instead.
The contents in the dark-coloured area at the bottom of every page (known as the footer) cannot easily be edited without advanced knowledge of WordPress. If you need to update this content, please contact us at digital@staffordshire.gov.uk and we will be happy to make those changes for you.